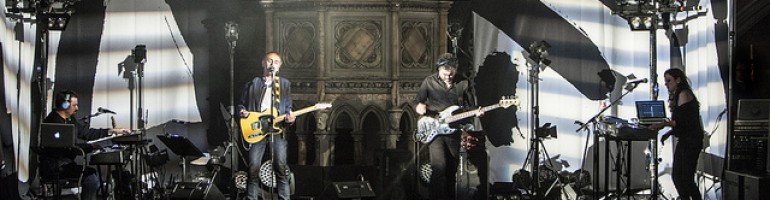
More music tech goodness to chew on folks! I decided to make a short film showing the integration of a bunch of new things, Logic Pro X, the iPad Air plus the Native Instruments Maschine Studio running the V2.0 software. They play really well together!
Logic Pro X
I have made no attempt to hide my distaste of the music software Logic in the past, perhaps because I am a long time Cubase user it is ingrained in me but also I just think that for years it has really lagged behind other DAW’s too. Well, I have changed my mind, slightly! I had to buy Logic due to a collaboration with an artist I am working with. It just made sense to do this rathe than both of us lose time with trying to convert the projects back and forth between our systems. Besides this artist, there is another that I will be working with soon who is also on Logic X too. I had previously bought (against my wishes!) Logic 9 which I hated with a passion so I wasn’t too thrilled at the prospect of spending more time in Logic land. We’ll I need not of worried too much as Logic X is a huge improvement over its predecessor. The much needed facelift has finally banished those tiny menus and the relocation of things like the transport bar to the top has made the workflow more intuitive. Track stacks bring a Reaper like function when you group a bunch of tracks into a folder, that folder gains a dedicated fader – are you listening Cubase? There is now a bass amp emulation called Bass Amp Designer and low and behold when I first instantiated (correct term!) the plug in I was faced with a graphical reproduction of my classic old bass amp a Mesa boogie 400+ and my old cab too, the quirky 1516. I have never seen these emulated before and I was really impressed with how it sounded. There is the much talked about Drummer plug in which lets you choose drummer by personality (?) and also you now have a basic Melodyne like functionality called Flex pitch which I have yet to try amongst countless other improvements.
My old bass amp amp now in Logic Pro X – Mesa Boogie 400+
Logic Remote
Logic Remote showing mixer
The show stopper for me though is the clever Logic Remote app for iPad. Borrowing heavily from the iPad version of GarageBand, this controller allows you to mix, edit and perform using a very intuitive control surface. Interestingly they have taken the Smart instruments idea and made them in to controllers for the Logic instruments. I marvelled at the design of these a few years back when they debuted on the iPad GarageBand so they are welcome here. These essentially let you turn the iPad into various types of midi controller, a guitar simulator, drum pads and chord strips on top of a regular piano keyboard that can also have notes stripped away to display only in key notes. Cleverly these follow whatever the region’s key is which is set in the main info panel at the top of Logic X. I have been banging on for nearly a year now about the wonderful chord track in Cubase, well Logic gets a halfway house now with the arrangement track combined with being able to set keys for regions. In practice I have found the Logic Remote to be the most robust and reliable of all the different iPad based control surfaces I have tried. Probably to do with some secret voodoo that Apple have going on that is closed to all and sundry however it works very well and maintains connection quickly after bringing the iPad out of sleep. This was the killer in the past for other controllers as it would often mean that you would have to jump through a few hoops to get things synchronised again. One feature I particularly like (which the Cubase Equivalent, IC also has) is the ability to create shortcuts and macros and give them dedicated buttons.
Logic Remote showing shortcuts page
Maschine Studio Intergration
You may have read my Maschine Studio and software review or saw my Sonic State review. If not you can find them here so I won’t go over old ground as to what it is needless to say though that you can run Maschine software as an Audio Unit (AU) within Logic X. The cool thing with doing this is that the Smart Instrument controllers operate on the Maschine too via Logic’s own routing. I didn’t have to set anything up, they just worked. This is very cool as it allows for Ableton Live Push like functionality which was left out of Maschine v2.0. This means you can use the aforementioned preset scales on the sounds within Maschine. I try and demonstrate this in my video so I recommend watching that to see it in practice although the tune I make is quite meh!
Maschine, Native Instruments popular beat making and sampling software/hardware combo is under going a major revamp. Not only is there a new version 2 of the software which is backwards compatible with all previous hardware units, NI are also launching a top of the range hardware controller in the Maschine Studio. I was fortunate enough to receive one early in time for my review for the ace music technology site SonicState.com. Below is a link to my review.
Maschine Software Version 2.0
The software is both Mac and PC compatible. It is apparently a ground up rewrite and I’m pleased to say that finally the software utilises multicore cpu’s and is far less processor intensive as a result.
The Headline new features are side chaining, unlimited groups, unlimited plugins, arranger timeline and my favourite, new drum synth models. On top of this list there are countless more improvements. After using the software for a few days on my Mk1, I was struck by how although it still works in a very familiar way, the new features just make sense and you won’t find yourself facing a steep learning curve you’ll be knocking out banging beats in a jiffy.
The Browser and Library
Lets first have a look at the greatly enhanced browser.
So browsing even on the Mk 1 has been radically overhauled and is swifter and more predictable. A major shift in the way it works is the dropping of the confusing modules approach and now adopts an altogether more easily understood channel and plugin terminology. A comprehensive tag based browser on screen lets you narrow down selections from the huge library of 8 gigabytes including 445 drum kits, 388 multisampled instruments, 403 sliced loops and 8627 one shot samples. It also includes all the presets from any other Native Instruments plugins you have installed. Apart from the presets, pressing shift and browse lets you select any of the internal plugins in a vanilla state or any VST/AU/AAX/RTAS plugins that you have installed. All NI plugins have a nice graphical overview which aids to visual recognition and is an appealing touch.
Drum Synths
There are now five different drum synths built in – Kick, Snare, Hihat, Tom and Percussion. These are not samples but clever Reaktor based drum modellers which bring an astonishing amount of electronic or acoustic sounding drum sounds to the party. Here is the kick synth. We can flip through the different engines and as we do so the available editing parameters also change. I found by layering two or more of these kicks together, the range of tones will probably mean you will spend less time browsing the gigantic collection of samples and seek out truly original sounds which in my book is a much more satisfying pursuit. All the drum synth engines have useful amount of parameters with the biggest change coming from the engines themselves. There are different amount of engines available per drum type:
It could be argued that these alone are worth the 99€/99$ upgrade. In the time I have spent playing with them it makes the Maschine unquestionably the best sounding digital drum machine I have ever used.
Along with these drum synths Maschine 2.0 now comes bundles not only with NI’s veritable bass wobble master Massive (as has been available since version 1.8) but now comes with Prism, Scarbee Mk1 Electric Piano and the Solid Bus Compressor. These are collectively known as Komplete Selection and rather than being cut down versions are the full products that have previously been available as full price plugins.
Mixing and Side Chaining
Fans of the macro controls will be pleased to learn that these are now available at all three levels – Sound, Group and Master as opposed to just groups in the previous version. These let you set up parameters for tweaking in a fairly swift manner and is much improved in my opinion. Also new as mentioned earlier is side chaining which along with multicore support must rank as the most requested feature. To enable side chaining simply choose the input source on suitable effects to the output of the sound or group you wish to have modulate. Very easy and effective. We can also see the new plug in strip here which greatly improves visual recognition. The new mixer view accessed on the software with shift+navigate gives a much clearer overview of the relative levels of all sounds and groups. Sadly as of yet they are not adjustable from the older hardware in this view. Possible future update?
Song Arranging
As with the older version of Maschine, sequencing is based on creating scenes which are collections of patterns. This approach has been much criticized in the past and I’m afraid much of that is still valid. Scenes are rigid vessels whose length are governed by the longest pattern contained within. Having patterns overlap scenes is impossible without complex copy and paste procedures although there is now a much welcome independent loop which can span different scenes. If you move your cursor to the edge of the ruler you can drag the loop start and here for the loop end. The loop reverts back to scene as soon as you press a scene button. There is no way to record realtime scene switching and again as before no way to automate mutes. If you were hoping like me for a more Ableton Live approach with version 2.0 this aint it. Maschine is not a DAW, it is a pattern based drum machine and sampler and it pays to remember this. One hugely useful feature mysteriously missing from the older versions does make an appearance here and that is screen follow. I used to find it incredibly annoying to have to switch to the navigation mode to adjust the on screen software so I could see what is going on, that is now fixed and is toggled either via the hardware or the software.
Speaking of Ableton though, another much expected feature hasn’t made the cut either and that is predefined scales alà Push. When you play musical notes on the sixteen pads they are always mapped chromatically. Sadly note repeat still doesn’t react to swing which will disappoint many. That may be addressed with an update with any luck. Also still no realtime timestretch either which is another much requested feature.
Software Summary
It should be said at this point that apart from a few small details, all of the new features are available to all members of the Maschine family , Mk1, Mk2, Mikro and the new Maschine Studio. NI should be applauded for continuing support of the MK 1 which is now over four years old. The new workflow ingeniously uses the existing hardware and is a definite and undeniable improvement.
Moving on now to the new Maschine studio.
Maschine Studio
Firstly lets say what is not. It doesn’t feature an audio interface which seems odd especially at this price point especially compared to it’s nearest rival Akai’s MPC Renaissance which sports a significant amount of i/o. It does however feature three midi outs and one midi in plus two footswitch inputs. The footswitches are currently mapped to play and record but we will see more options for those in the future. Native Instruments inform me that this was a conscious decision as this unit is very much geared at being used in studios which will probably have all the audio i/o catered for and to include a suitable audio interface would add significantly to the already high cost. This, is as you can see a very large unit and is not really geared at being an all in one live unit. In fact finding a suitable bag or box to transport it safely in may prove to be tricky given its unusual dimensions. An argument for the lack of audio interface could be that having a load of cable spaghetti attached may interfere with its attractive looks and limit its position within the studio.
The Studio also doesn’t feature anything that you can’t achieve with the other models which is surprising given the £279 street price of the Mikro. It does however offer a much more streamlined approach to Maschine based productions helped in no small manner by the large clickable illuminated jog wheel and those quite lovely high definition colour screens. The design goal was to build a unit that you could lose yourself within and not have to look at a computer monitor and this it largely succeeds in. Those displays show the various plugins with appealing graphics and although they look like touch screens, they are not and like the early models they rely on the 8 encoders plus the eight illuminated buttons for control. The displays also can show the arranger timeline and is especially adept at displaying sample waveforms.
Sitting in front of the Maschine Studio is a slightly daunting prospect though as it looks like it means business. It has such a presence and I have to say that the once elevated with the built in stand, the angle is just about perfect. The stand legs may appear to be small but they are far from flimsy and the Maschine Studio impresses overall with its excellent build quality.
Pads
The pads themselves are the same ones from the MK 2 and very responsive and feature the same assignable colours. They sit marginally lower into the hardware than on the Mk1 and are definitely more sensitive and predictable. Also all the control buttons have that reassuring gentle click again introduced with the MK2’s.
Jog Wheel
The jog wheel forms an integral part of the operation of the Studio and replicates some of the Mk2’s multifunction knob as well as many advanced editing operations. 6 illuminated words give an indication of the current function but with none lit it is a beat locked jog wheel. Holding down a pad and clicking on the jog wheel lets you select between tune, swing and volume for that particular pad. One area where this wheel shines is in note editing. In conjunction with the dedicated events button, it is now much easier to manipulate notes within a pattern. Simply select the pad that corresponds to the note and then holding note allows you to repitch or hold nudge to adjust the timing.
Level Control Section
The nifty level control section on the top right can be switched to monitor incoming audio plus various outputs including the new cue feature which will be of interest to live performers given that you can audition patterns and loops independently audio interface permitting. Being able to select sound, group or master and having the rotary encoder beneath controlling the levels is very nicely implemented. Pressing one of the four input input buttons changes the meter to monitor any inputs you have set up with your audio interface ready for sampling. above the section are the midi in and out indicator lights.
Mix View
The aforementioned mix view is well catered for on the Studio and is very easy to navigate due to those lovely screens. A quick press of the dedicated mix button shows the volume and pan positions of each sound within a group (over two pages) and with a press of the back button can jump back to show the group levels. Selecting a group with one of the illuminated group buttons followed by a click of the encoder then allows for level mixing and panning of the sounds of that particular group. Very intuitive and satisfying. In previous versions, mixing was a bit of a hit and miss affair so there’s plenty to like here.
Sample Editing
When it comes to sample editing, it is here that the dual displays come into their own. The sampling process is largely the same as in the older software which is a good thing as that was a real strength of the Maschine. It has however had a few tweaks such as being able to have a separate play range and selection range which makes for easier fades and inserting silence. Here we can see that the left screen shows an overview of the whole sample whilst the right view can zoom and scroll. A lovely feature is this sample mapping page where with minimal controls, its fast and easy to stack multiple samples with using just a few controls.
Summary
As with all Maschines, there is a definite sense of being behind an instrument but the Maschine Studio however with the new editing paradigm and those lovely screens, it enhances that experience to the next level. The multi coloured LED’s may not be to everyones taste but it certainly helps with navigating your project and looks real purdy too in my opinion! The big question as to is it worth upgrading to if you are already a Maschine owner? I think it depends on how integral Maschine is to your studio workflow. It doesn’t do anything you can’t do with the other models but it does do it in style! It is more enjoyable and a significantly faster experience. You definitely pay a premium for this and given the prices of the other models in the range, it does feel like a luxury product. That being said though, if you are going to spend many hours within the Maschine world then you will really appreciate the thoughtfulness of the layout and design and that could be all the justification that you need!